
| |
Welcome
Join
the travels of Bernie Harberts at RiverEarth.com. The "Lost
Sea Expedition" is Bernie's voyage in a mule wagon through
the center of the USA - across what was millions of years
ago a sea.
MuleCam?
Technology on the mule wagon! Once
Bernie is underway MuleCam will update every hour with
a new picture of where the Expedition is...
|
Introducing
MULECAM!
 |
Sunday, December 25, 2005
Busted Wagon Hoops and Then Success- Southern Pines, NC
Ok, so the Christmas rush is over and now it's time to make hoops for the roof of my wagon. As usual, I consulted my Technical Drawing Number One.
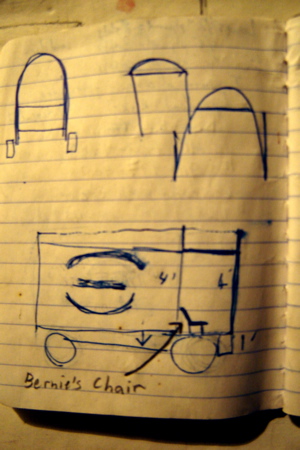
Technical Drawing Number One: the roof beams are at 12 o'clock.
Ok, ok, so you just saw Technical Drawing One two updates ago. But a quick sketch is really all you need if you want to build a wagon badly enough.
Wagon hoops are the pieces in a wagon's roof that give the roof that barrel-backed look. Back when they took wagon building more seriously than I, oh, and they had apprentices, they used clear lengths of white oak sawed into staves. These thin strips of wood were bent into place while green, or, if dry stock was used, they were steamed first. Then canvas, or if you were poor, an old blanket, was stretched across the arched frame work.
But times have changed and I don't have a thousand board feet of prime oak behind my garage. No, I'm more in the plywood league so I decided tradition would have to sit this one out. Wagon masters of the old Butterfield Stage, forgive me.
First I cut two-inch wide by eight-foot long strips out of a sheet of quarter-inch plywood.
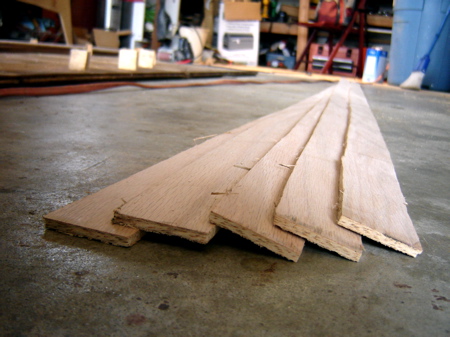
Plywood strips ready for laminating into wagon hoops.
Then I drew the arc of the wagon roof I wanted onto a sheet of three-quarter inch plywood.
Next, I screwed a dozen blocks of wood, called "cleats" in boat-speak, along the line on the plywood. After I spread glue on my wood strips, I'd clamp them to these wood blocks to give my wagon hoops their shape.
This was fine progress and I congratulated myself I didn't need white oak or a steam box as I slathered the wood glue on each side of five plywood strips. Now I just had to clamp strips onto my home-made jig.

Ok, strips glued up. Just have to clamp them in place now...
Glue ran off my hands as I sprang the strips against the cleats, ready to clamp them into wagon lore when BANG!!!!!
They broke in two. All five of them just shattered and sent Titebond glue and splinters all over the shop, my coat, but most seriously, all over my beloved stockman's hat.
"Man, what's going on here?" I wondered as I maneuvered the splintered lot into the firewood heap.
After I wiped the creamy mess of my hat, I checked the radius of my arc. No, it wasn't too tight.
Then I looked a bit closer at my pile of plywood strips and discovered a secret I'll pass on to you in case you're building wagon hoops in your garage.
Plywood bends better in one direction than another.
Try it. Take a long, thin strip of plywood, like I was trying to glue up. Hold it in your hand and let the ends bend down. Then flip it over. The ends will either hang down more. Or less.
So I did what I call the "droop test" with each piece of plywood, just to find out which way the wood wanted to bend. Then, when I knew which way my strips wanted to flex, I slathered them with more Titebond and clamped then onto my jig.
Perfect. I never broke another piece after that.
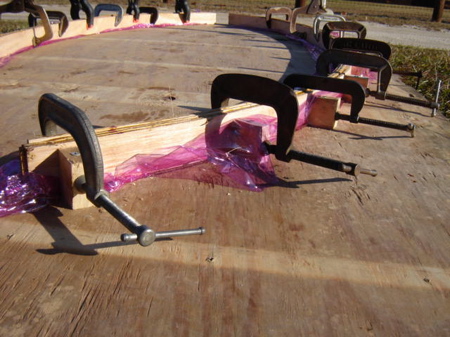
Success! The purple plastic wrap keeps the glue from sticking the hoops to the plywood jig.
Now I have six wagon hoops. And a glue stain on my hat.
Next we'll bolt the wagon walls and roof beams to the frame.
Bernie
RiverEarth.com
posted
by Bernie at 6:05 PM
|
Contact:
|
|